Before you start
- Your company profile contains the correct business name and contact details.
What you'll do
You will choose the notifications that fit your customer experience and test them before relying on them.
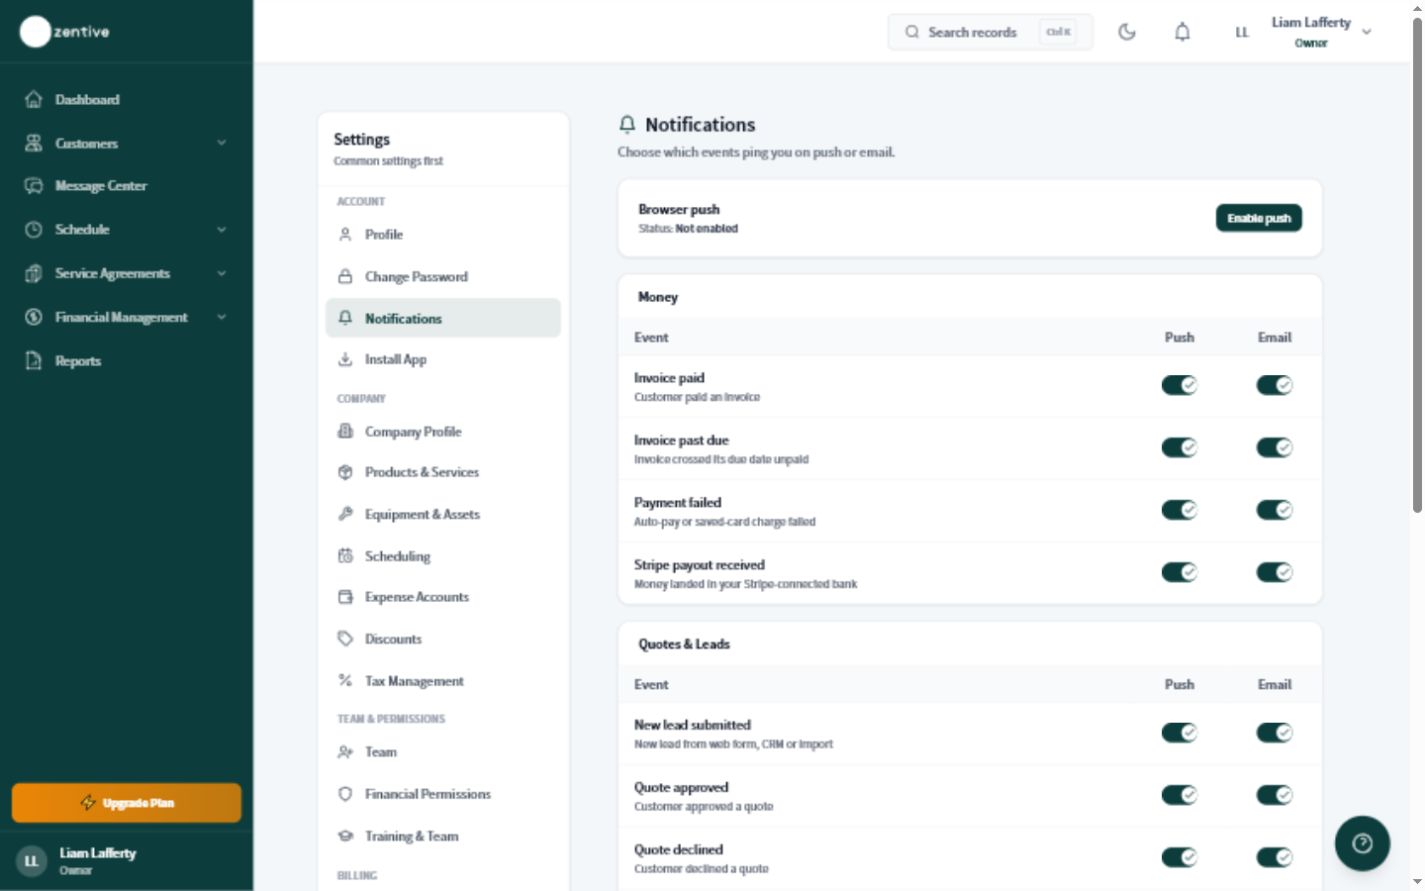
Configure notifications
- 1
Open Notifications
Go to Settings, then Notifications. Open SMS Notifications separately when you need text-message controls.
- 2
Choose important events
Start with appointment confirmations, schedule changes, quote or invoice delivery, and payment receipts.
- 3
Review the sender details
Make sure the business name and reply information are recognizable to customers.
- 4
Save your choices
Save before leaving the page.
- 5
Test with a safe customer record
Use a staging or internal test contact and confirm the message wording and delivery timing.
Good notification habits
- Send only useful updates.
- Keep contact details current.
- Do not promise an arrival time the schedule cannot support.
- Review automatic messages after major workflow changes.
Was this helpful?
Still need help?
Contact Zentive support
Include your business name, account email, what you were trying to do, what happened instead, and a screenshot if possible. For billing, sync, or login issues, include the exact error message if shown.
Replies by emailLogin, billing, sync, and setup help
Email support